Showing posts with label Projects. Show all posts

Saturday, February 8, 2014

Baby Boy's Nursery Reveal!

Finally! With only a month to go until baby boy is due to arrive, his nursery is finished! (with the exception of missing the glider rocker, which should arrive on Wednesday)

Avery's nursery theme came so easily and there were so many different options available, but I struggled for a long time deciding on a theme for this room. I went back and forth with 2 or 3 different ideas for months before deciding on a 'Giving Tree' theme (the book by Shel Silverstein) If you haven't read the book, I highly suggest it. It's about a tree (a personified 'mother') and a little boy that she loved so much she gave literally everything she had to him to make him happy. The only reason I didn't stick with this theme originally was because the message the book sends can be a bit of a downer (the tree gave and gave and gave to the little boy but nothing seemed to satisfy him) but in the end, I think the overall message is one of unconditional love and that along with the simple drawings in the book sold me. (Thanks to my awesome sister for helping me decide ;)

The new nursery was our old guest room (Justin's office now serves as both his workspace AND a guest room) and although we kept the paint color the same, Justin and I spent a lot of time in the beginning adding a board and batten look to the bottom half of the walls, which we think really makes the room pop. I'm SO disappointed that we didn't get a 'before' photo, but sometimes we just get so excited to start, we forget to stop for a second and take a quick photo. (Imagine a pretty dark room with a bed in the middle and a side table, that's about what it was)

Here are a few shots of the nursery now:
 
Side 1: We ended up purchasing another crib because Avery isn't quite ready to transition out of his and when he is, it's a convertible style so we will just remove one of the rails and it will become his toddler bed eventually. This crib we bought for baby #2 is the same style and will grow with him. 

I made the bed skirt out of 1 yard of home dec fabric using this tutorial (it took me about 1/2 hour and cost about $10 - perfect!)

I also made the quilt and will be reusing the same sheets and bumper pad that we used on Avery's crib.
  
That gaping space on the right will be where the glider will eventually be. Since we still use the one in Avery's room daily, we ended up purchasing a new one of those too and it will be in our room for a few months while baby sleeps in there with us (isn't it funny that I feel a need to FINISH the nursery before baby arrives knowing full well that he won't actually spend much time in here until 4 or 5 months later? Silly nesting...)

When Justin was away for a conference in Florida a few months ago, I filled my alone time in the evenings with this tree painting project. I just free handed a tree in the style of the ones in the book and painted them with the same paint that we used for the board and batten. I made some 3D apples out of heavy cardstock and hung them from the ceiling (they hang over where the glider will be)

The book shelves on either side of the crib were an idea I found on Pinterest using these spice rack shelves from Ikea. They are a little more functional and hefty than the ones in Avery's room and will hold plenty of books! :) 

The framed prints are spreads from the book that I scanned, spliced together and removed the words from. Then I printed them out on green cardstock, matted them, and hung them in frames I painted to match the rest of the white in the room.

Side 2: This dresser that I refinished a few years ago has been in this room since we moved in and with its wide top and spacious drawers, it's now a perfect changing station. The white walls really make the dresser and the mirror (that was already mounted on the wall) look EXTRA awesome :)

I painted and bought a new shade for an old lamp we had, bought a cheap changing pad from Ikea and attached another Ikea shelf to the wall to hold lotions, etc. and this whole changing set-up ended up costing us less than $10! 

The shelf on the right was made by Justin and will hold the baby monitor, fan for white noise, and maybe a basket for toys.


Side 3: The curtains are blackout curtains from Target, the frames to the left and right of the window will hold baby's name collage and a baby photo, and the little window seat underneath was also made by Justin and has baskets filled with baby toys and stuffed animals (Avery has really enjoyed finding these little treasures!)

A view of the whole room (from the doorway) There are a few more 'personalized' things that will be added once baby is born but for now, it's a very peaceful space just waiting for a little wiggly boy to make it complete :)

Thursday, January 23, 2014

Baby's Quilt - Finished!

I just wanted to pop in and share a couple photos of baby boy's finished quilt! I've been spending most of Avery's napping hours working on it over the last few weeks and although I'm glad to cross one more thing off my list, I will miss the therapeutic time spent working on it. 
My second quilt not only went much more smoothly than the first, but it's also much more straight and square. (Avery's quilt was quite a learning experience...) I used the same pattern (pattern found here) but chose a very different color scheme, one that matches baby's nursery perfectly. Here's a sneak peek of the quilt in it's new space, more pictures to come (hopefully it will be complete very soon!)

As my list becomes shorter, my belly certainly continues to grow and baby boy is making himself much more of a presence. Avery finds it very funny that my belly button is more of a real 'button' these days and he takes every opportunity to press it and giggle :)  Beep beep!

32 weeks!

Wednesday, June 12, 2013

Avery's First Birthday BASH!


We hosted Avery's birthday party last Sunday in our backyard - it was a total success! The weather was beautiful, we were blessed to have some of our closest friends and family with us to celebrate, and our little caterpillar seemed to enjoy himself very much! (The cake smash was the highlight!) I've been planning this party for quite a few months in my head and it was so fun to see it come to life. It certainly took a village to pull together, there's no way we could've done it without our awesome family and friends to help us out. (Thanks, guys!!!) 
 
Here are some of the highlights of the party:
 The FOOD! What is a Very Hungry Caterpillar party without some fruits? (and veggies too, in our case!) We had all the fruits featured in the book, a few of the 'junk foods' the caterpillar ate on Saturday, and a few extras too. I cut out little flags with pictures of the fruit from the book and attached them to sticks to pull the theme together.  On the food table, I set up a copy of the book, a framed picture of Avery and a fun quote from Eric Carle about The Very Hungry Caterpillar along with one of Avery's fuzzy caterpillars :)

Thanks to my super talented sister, Janessa, who helped me bake up tons of cake pops late into the night on Saturday, we made up these cute edible caterpillar centerpieces for the tables. (I LOVE those little chocolate chip eyes!) We had lemonade to drink with flavored ice cubes- I cut up chunks of raspberries, strawberries and mint leaves and froze them with water in an ice cube tray for guests to make their own flavored lemonade creations!

I made all the paper garlands (that lined the tables and hung around the food table) and the pennant on Avery's high chair out of paste paper, cut them into circles and triangles and sewed them together with my machine. (The making of the paper and the sewing were relatively quick steps, the cutting was the most tedious but was a great activity for me while riding 8 hours to Tennessee and back a few weeks ago!)
 
The Favors! I found these cute Very Hungry Caterpillar paper baskets and crayons at Target months ago and snatched them up just for this purpose. I also included little coloring books that I made by cutting up this coloring sheet in Photoshop and printing it on cardstock. I also stuck a handmade pinwheel in each basket (I'm a sucker for pinwheels:) made out of the same paste paper I used on the garlands. Tutorial I used for pinwheel here. (I just used plastic straws instead of dowels)
 
 The photos! I printed all of Avery's weekly photos I took this year and hung them from a string on the wall next to the food table with wooden clothes pins. It was SO FUN (and a little bittersweet) to see all of the pictures together and to see how Avery has grown and changed.
It was a fun project to do, and even more fun to see it now completed!

The Fun! I'm a little disappointed to say that I really slacked the rest of the day taking photos. It went by so fast that I didn't get any shots of the backyard as a whole or of many of our family and friends that were there... Thank goodness my sister got a few shots of some of the fun things that were going on. Our awesome friends let us borrow their jumping castle, complete with a slide and everything! Avery loved it! (so did everyone else :)

Avery's sand/water table (sand-only today!) was a gift from his Grandpa & Grandma Wachsmuth and was a huge hit at the party! This was Avery's first experience with sand and although most of it found its way out of the box, thankfully none ended up in his mouth!

This was the surprise favorite at the party - the 'Water Blob' made out of a sheet of thick plastic, a roll of Gorilla Tape, and water! (tutorial here) A big thanks to my brother, Josh, for taking on this project the morning of the party! What fun it was!!

It was such an amazing day - we are so blessed to have so many awesome people in our life that love and care for our little Avery so much :)
Our sweet baby boy, the One-Year-Old!

Oh, I almost forgot! I've been working on a little sewing project for the past few weeks too! We got Avery a circus tent for his birthday (from Ikea) and to go with the theme, I made some pouf cushions and a cloth ball for Avery to make the inside of the tent more comfy :) I used this tutorial for the poufs and this tutorial for the ball. The poufs were SO FUN to make, I may make more of them in the future! The first one took me a while to figure out, but I finished the second one in TWO naptimes! (I time my projects in terms of how many naptimes they take me ... and TWO is really good!)
 The happy boy lovin' his new playspace!

 There is NOTHING cuter than finding him in here reading books... my heart may burst.
-xoxo-

Saturday, March 23, 2013

Avery's First Easter - Shaker Eggs!

With Easter coming up, I've been hunting for ideas for Avery's first Easter basket. Since he's only 9 months old, the usual candy, socks and CD that my mom bundled up for us as kids doesn't really seem developmentally appropriate. (was I the only one to get socks and underwear every year in my Easter basket? If only that tradition carried into adulthood, I've been burning holes in too many socks around here lately... but I digress...)  

Avery is big into music and things that make noise lately, so I decided that making shakers out of plastic eggs was the way to go. I went on the hunt for the perfect plastic eggs, which turned out to be somewhat difficult. (Who knew that most plastic eggs had small holes in them?!) I finally found the perfect ones (at the grocery store, of all places) that have a colored half and a clear half - and seal tightly. This way Avery will be able to hear AND see what's making noise inside!   

I proceeded to hunt around the house for different fillers (There are SO many possibilities of what you could fill these eggs with, I just chose to use what I had lying around) I tried to find things that made a variety of different sounds.

Here's what I found:
1. Plastic buttons
2. Sugar/Salt/Sprinkles mixture (this one was sort of an experiment of things I found in my baking cupboard) Sand would work great too, but the only sand I had was brown and dusty. 
3. A single piece of potpourri I was going to use a rock, but the potpourri was lighter and still made the great 'thunk' sound I was going for.
4. White rice
5. Candy balls (Leftover from Christmas gingerbread-house-making :)
6. Jingle bells At first I had coins in one and bells in another, but decided they both made pretty much the same sound so I nixed the coins.

After filling the eggs (I tested them all to determine how much of each filler I should add to make the best sound), I hot glued the halves together and
Voila!
I fun baby-safe Easter activity!
The hot glue seems to hold pretty well, I tried my best to open one after I glued it and I was unsuccessful, so I'm thinking that's a good sign. :)

I buried the eggs in a basket with a bunch of Easter grass so Avery can dig them out (another of his favorite past-times, emptying out every basket/box/bag he can find :) and filled it up with an Easter bunny Snoopy and a bottle of colored bubbles. Hopefully he enjoys it as much as I hope he does! Check back in a couple of weeks and I'll share his verdict. :)

Come to think of it, I'm almost positive the grass will be his favorite part. Oh well, at least the eggs were cheap and easy to make! (and mom sure had fun with them!)


What kinds of fun things do you remember getting in your Easter basket every year? 


What are some of your favorite baby-safe basket ideas?

*** UPDATE *** 3/2015
I just wanted to follow up for anyone just reading this post for the first time.  Almost 2 years after I made these eggs for Avery, 5 of the 6 are still intact and the glue is still holding strong! (the lost egg met its demise underneath one of my feet...)   Avery and his little brother (who will turn one next week!) rock out with these eggs several times a week (and are anything but gentle with them) and I'm impressed at how well they have held up. I hope you'll give them a try, they continue to be a big hit in our home!
 

Friday, March 22, 2013

Happy Birthday, Max!!

Last Saturday, we spent the day celebrating a very special FIRST Birthday with Avery's BFF, Max!! I've been starving for craft projects around here lately, so when I found out that his mom and dad were planning a Dr. Seuss party, I volunteered myself (and Max's willing Godmother) the official 'decorators' :) I had SO MUCH FUN making 'Truffula Tree' table centerpieces, a Seuss-inspired birthday hat and even got my sewing machine out and stitched up a pennant birthday banner and mini high-chair banner for the birthday boy!

I even got to help whip up some cake pops the night before, which turned out mighty fine after a few minor setbacks ;)
(and how cute is that Dr. Seuss hat cake his mom & dad created?!)
It's gotten me super excited to start planning a not-so-far-off first birthday party for another rapidly growing little man I know!

Tissue paper pom poms - tutorial here
Yarn pom poms - tutorial here
 'Seuss Stew' - recipe here

Avery had such a good time at the party, and kept himself entertained with a water bottle for well over an hour. I can't believe how big he looks in his little dress shirt that matches daddy's  :)

Friday, March 8, 2013

9 Months: Avery on the Move!


The days of 'lay-baby-on-the-blanket-and-he-will-stay-there' are long gone...
Most of the shots I take end up something like this :)
Wow, what a month!
It took me 37 weeks, but I finally used up every piece of fabric I had in the house, including Bella's dog
bed (week 37). I had to go out and splurge on a bunch of 1 yd pieces to finish out Avery's first year.
So, if anyone has any project ideas that call for 1 yd of fabric, let me know! :)

His Pooh table is one of his favorites right now, and
the first thing he pulled himself up on.
Avery had his 9 month checkup yesterday.
He is now:
20 lbs, 9 oz.
(down to the 64th percentile)
29.8 in. long
(still in the 94th percentile)

I've definitely noticed him changing physically in the last month. He's becoming less 'chubby baby' and more 'slim toddler'  (cue the mama tears...)


On February 11th, Avery took off crawling and hasn't stopped since :) He's loving his new-found freedom and is keeping his mama on her toes.
2 days after he started crawling, he pulled himself up to standing and crawling quickly lost it's appeal :) All the boy wants to do is stand and walk behind his walker... by himself. (How did this happen?!?)

This month, Avery
...Is currently battling a really nasty cold. We have been very fortunate, this is only the second sickness of his young life. Regardless, he is a cranky, snotty, cuddly little mess of a boy. All he wants to do is be held and cuddle (which this mama doesn't mind at all, he IS a world-class cuddler after all)  but it's heartbreaking to see him so miserable.
 

...Watched Sesame Street for the first time. (it's helped get us through these last few days when all Avery wants to do is sit in my lap and rock) 

...Enjoys chasing Bella & Jasper around the house. Bella has become quite the protector and wants to be wherever Avery is. On another note, Jasper stuck Avery with his claws for the first time and drew blood. If you happen to know someone who would like a fluffy, independent cat with an eating disorder, I know where you can get one for free.

...Had lots of visitors from Wisconsin!! My aunt & uncle stopped in on their way to Alabama and on their way home, our friends from Rhinelander spent a night while they were in the area, and Grandma & Grandpa Stewart spent a weekend and gave us a much-needed date night out without Avery! (He had a blast with them of course, maybe it was their matching red hoodies? :)  It's always so nice to have visitors, it gives us something to look forward to.

...Went swimming! It wasn't his first time in a pool, but this time he was so brave he hung onto the side of the pool by himself and crawled right in the zero-depth entry until he was up to his eyes! I think he probably would've kept going had I not made him stop. Such a little swimmer already, it makes this former swim-instructor mama so very proud :)


...LOVES when we read books to him and has mastered turning the pages by himself. Grandma and Grandpa even brought him a few new Sesame Street books that have been added to his growing list of favorites.

...Eats finger food! Avacado and Banana, to be exact. He gobbled both of them down with no gagging and very minimal mess! He definitely looks way too big eating 'big boy food'.  He also added blueberries, mango and eggplant to his growing list of foods tried.

...Had his first taste of a Shamrock Shake which he loved, probably because it reminds him of his days in the womb when his mama enjoyed WAY too many of them ;)

 
...Had a spaghetti party with Max!! 
Although both of these boys were a little unsure of the slimy spaghetti at first, they were both good sports and gave it a shot. I think they both came around and got some enjoyment out of it, Avery loved eating the spaghetti most of all... go figure :)


...Is a great workout partner until he crawls in front of me and confuses the sensor :)  (I'm currently doing a program on Nike Fitness for Xbox Kinect - it's quite the workout, especially when I'm trying to keep one eye on the screen and the other on my little explorer:)

...Smiles a scrunched-up-face smile that perfectly shows off his 2 lone teeth and makes me giggle every time.

...Prefers to stand in the bath. All the time. Bath time is a much shorter ordeal these days. 

...Is developing quite the attitude. He will certainly let you know (often at a high volume) when he feels he has been served an injustice. Like when I take something away that he feels he should be allowed to keep. Like a bowl of dog food or a plastic garbage bag.

And just in case you don't believe me that this baby is getting too big too fast, here are a few videos to prove it...

 Avery showing off his cute wave and telling a very involved bathtime story...

Taking a walk behind his little 'mail truck'...

and testing out his new balance skills!..

We are anxiously awaiting the arrival of spring around here... we are all in desperate need of some sun and fresh air. The forecast for this weekend calls for highs in the 50s, let's hope this is a sign of what's soon to come!

Monday, October 29, 2012

Avery's First Sensory Bag!

I'm an advocate for offering kids different experiences that help them to figure out this big 'ol world they're living in - even if that means letting them get a little messy. Thanks to my favorite website obsession, Pinterest, I have found some amazing ideas for all kinds of fun play that engages kids by allowing them to experiment with different things. 

My ultimate favorite is Growing a Jeweled Rose. If you're looking for fun activities to do with your kids that are sensory, educational, and cheap (most of them are made out of things around the house), this is a great site to browse around! I seriously want to repin EVERYTHING she posts and I'm so excited to try out all the neat things she has that I'm almost excited for Avery to get a little older to enjoy them. Avery is getting to the point where he's old enough to experiment with Sensory Bags, so I whipped one up for him the other day to try it out. He did love it, mainly because it looked like something fun to put in his mouth. Like everything else within arm's reach. :)

He especially loved watching the little characters move around when he hit the bag. It worked great on his tummy too because that's where he had the best angle to latch onto the surface :)  

I used a gallon-size freezer bag filled with water (I did buy some hair gel to use as 'goo' inside, but I thought I'd start with water just in case it leaked. I'll be using the goo in another bag down the road) and just filled it with stuff I had around the house - some yarn (which looks really neat flowing around in the water!) and some little foam critter stickers. I used duct tape to seal around the edges (for extra reinforcement). I wanted to keep the contents pretty simple for my first one, but there are SO many other cool things that I've been thinking of to put in future bags!

Here's a link to Sensory Bags if you want to try one out for yourself. (they're a GREAT way to keep toddlers busy, too!) and here's where you can find  50+ play activities for babies. Seriously, people, there aren't enough hours in the day to try out all these amazing things, but I'm going to give it my best shot!  (I see colored spaghetti noodles in a baby pool in our future!)


Sunday, April 1, 2012

Baby Quilt: Finished!! (finally...)

About 4 months ago, I decided I wanted to make a quilt for Baby Olive. It took me awhile to get started because it is, indeed, my FIRST quilt and I was pretty nervous about how/where to start. I bought a book (I chose BHG's Complete Guide to Quilting for the great step-by-step pictures inside!), picked out an amazing PATTERN TUTORIAL from Little Birdie Secrets (finding this tutorial is what inspired me to want to make a baby quilt in the first place - it is SO cute and the instructions were AWESOME! -and very simple for a first-timer like me!-) and chose a color scheme (I decided on lime green, teal, and brown - I didn't want it to be too 'pastel-y, but wanted him to be able to grow with it)

It took me forever to pick out the fabric and even longer to figure out the square combinations. BUT- once I got started, piecing together the blocks went really smoothly and before too long (2 months...) I had almost completely finished the quilt top.

That's when things start to get hairy.

In my never-made-a-quilt-before ignorance, I -on a whim- decided that I should throw the quilt top (before adding the outside border) in the washing machine on the 'normal' cycle. When I came to pull it out, this is what I found:
 An EPIC DISASTER.  
It was a tangled, ripped, frayed, pulled-apart-at-the-seams mess

I had myself a good long cry (I can blame hormones for that, right?!) and I was SO UPSET with myself for totally ruining 2 months worth of work in the time it takes for a spin cycle to complete. Seasoned quilters out there are probably wondering why in the world I would wash it at this point - especially on the normal cycle... to which I will plead 'pregnancy brain'. I'm still kicking myself for thinking that washing it before it was put together was a good idea... BUT that's how lessons are learned, right?! (why is it that I always seem to learn lessons like this the hard way?)  

So, I dried the tears, chalked it up to a learning experience, and promptly drove to the fabric store to pick up more of the same fabric to make Quilt #2. Yep. The same day. I was more determined than ever to make this quilt happen. It took me less than 1 week to finish piecing together the top (did I mention that I was determined?) and after ordering a walking foot to fit my 1989 Kenmore sewing machine (which took a few weeks...) I was able to sandwich the quilt together, add the quilt lines and binding and VOILA! Quilt #2 turned out even BETTER than Quilt #1!

The gathered block centers are my favorite part - they make the quilt so much fun and full of texture!
The border fabric is a white-on-white dots pattern - the perfect touch to an otherwise plain border
(without making the design too busy)
The backing fabric is 'minky' (THE softest fabric of all time) and it was great to work with because
it didn't slip around too much and it doesn't shrink when washed!
Do all the blocks line up perfectly? No. Are all the quilting lines even? No way. 
BUT- the quilt is overall square and VERY WELL SECURED (we don't want any repeat performances of the EPIC DISASTER above...). It has a heck of a lot of character and a really good story (of course, this is one of those stories that is only 'good' in hindsight). 

This is a true labor of love that involved a lot of blood, sweat, and tears (literally) and I'm proud to say that my first ever quilt will be my first gift to my first child. Pretty cool, I think. :)

Saturday, February 18, 2012

Nursery REVEAL!

I'm so excited to say that the first photos I show of the nursery are of it in it's finished state!!  Justin and I are the kind of people that when we get an idea in our minds, we're so excited to see the final product, we obsess over it a little. (ok, so maybe I was doing most of the obsessing, but Justin was a willing partner :) We've been working over the past few weeks on evenings and weekends and love the way that it came together! 

First of all, it is by total coincidence that the walls in baby boy's room are 'baby blue' color. This room was painted this color when we moved in and we chose it for the nursery because it is by far the brightest room in the house and was the easiest to transition into a nursery. (It was my 'craft room' for all of 4 months... it was nice while it lasted :) If baby ended up being a girl, we were going to keep the blue walls and just add lots of pink accents around the room to make it more of a 'girly' space.
BEFORE picture of the room... when it was in transition from my office to the nursery

We chose to go with an 'Eric Carle' theme (for those of you not familiar, he's the artistic genius behind The Very Hungry Caterpillar children's book, among many others.
We wanted something that was going to be gender-neutral and would last beyond the 'baby' years - I know many 7-8 year olds who still love Eric Carle! (Heck, I'm 26 and I still love him!) His work is made up of numerous different bright colors and textures arranged collage-style into animals and other natural elements. His books are also written in a very repetitive fashion, making them perfect for beginner readers. His whole style rocks my world... I see many themed Eric Carle events in our future... birthday parties, art parties, maybe even a trip to the Eric Carle Museum of Picture Book Art in Massachusetts? :) Oh, the possibilities!


This is the collection of Eric Carle prints that are placed on the wall above the crib. For safety's sake, the frames are screwed directly into the drywall on both the top and the bottom. No, the frames won't be able to be re-used as 'normal' frames again and Yes, the wall now has 18 large holes in it, BUT we can rest easy knowing there is NO WAY they will fall off or baby can pull them down. Plus, we can always switch out what's IN the frames, they will just always have this arrangement. (knowing how I am with decisions in general, not to mention PERMANENT ones, this layout took me many nights of swapping the frames around on the floor.) 
 
I got the 3 large (12" x 18") images from this book and the smaller ones I scanned some of these alphabet flash cards and printed them different sizes to fit the frames. Both the book of prints and the flash cards are AWESOME! The flash cards are large (good for small hands) and made of thick book board - each card also has a corresponding animal whos name starts with the letter on the card! Double awesomeness! 
The Book Wall. It was inspired by many similar ideas I found on Pinterest (who says Pinterest is a waste of time?! :) It will serve as a functional storage place for books, plus will be a rotating art gallery of book covers! We just picked up some unfinished shelves at Menards for $9 each, painted them white to match the trim in the room, and attached them with anchors and screws.  

1. We picked up this sweet little amphibian at a flea market when we went to go visit Justin's sister and her family in Texas in 2007. We have very fond memories of this trip, as it was our first ever together (and we had only been dating about a month at the time we took it!) 

2. This was one of Justin's childhood toys - The Happy Apple! (I'm pretty sure it's considered 'vintage' now) It's a wobble and chimes when it moves - it fits in perfectly in the room and I'm sure baby boy will love it just as much as his papa did!

*Book note: Thank you to Kohls and to my mother for frequenting Kohls for having Eric Carle books/stuffed animals as their current 'Kohl's Cares' fundraiser campaign. My mom brought baby the kangaroo book (and matching animal, of course :) and we picked up 2 of the other Eric Carle books for $5 apiece! AWESOME! And what great timing! They also have a really fun line of Eric Carle educational toys too!! 

The Changing Station is all ready and set to go, all it needs is some supply stocking! The diapers will eventually be put in the cloth bins, changing accessories in the basket, and lots of super sweet clothes in the drawers.
1. This 'Mandala Tree' embroidered wall hanging was a gift from Lisa (at Git Down Kitty) -See more information about Lisa and the creation of this masterpiece on this post. This is an inspiration piece and looks like it was made for this room and its blue walls. 

2. This frame will eventually house a 'name collage' that I will create and hang once baby comes. It will include name, birth date, birth time, weight, length, etc. (another Pinterest-inspired project!)

3. This frame is where baby's hospital bracelet will be saved. I love the idea of incorporating little personal trinkets/memorabilia to make the room more unique! 

The contents of the other frames are still somewhat unknown. I have many ideas and so little space! :)  I'll keep you posted.


The Cuddle-Nook is the brightest spot in the room (in the whole house, probably!)
and is the perfect size to accommodate lots of cuddling :) 

1. More Eric Carle prints - scanned and printed from flash cards. I thought these 3 sea life prints went really well together on this wall and remind Justin and I of our amazing scuba-diving adventures!

2. Tie backs I made out of leftover fabric from the window seat/toy box. They are really easy to latch and un-latch to close the much needed light-blocking curtains for naptime! I loosely followed this tutorial and attached them to the wall the same way.

3. This is a glass mosaic piece made by my sister when she was in high school (obviously, I love it because it's a panda, but more because she thought to give it to me! :) It fits perfectly in this room!

4. Our custom-built window seat/toy box! (an original design by Justin!) See all about how we made it here.


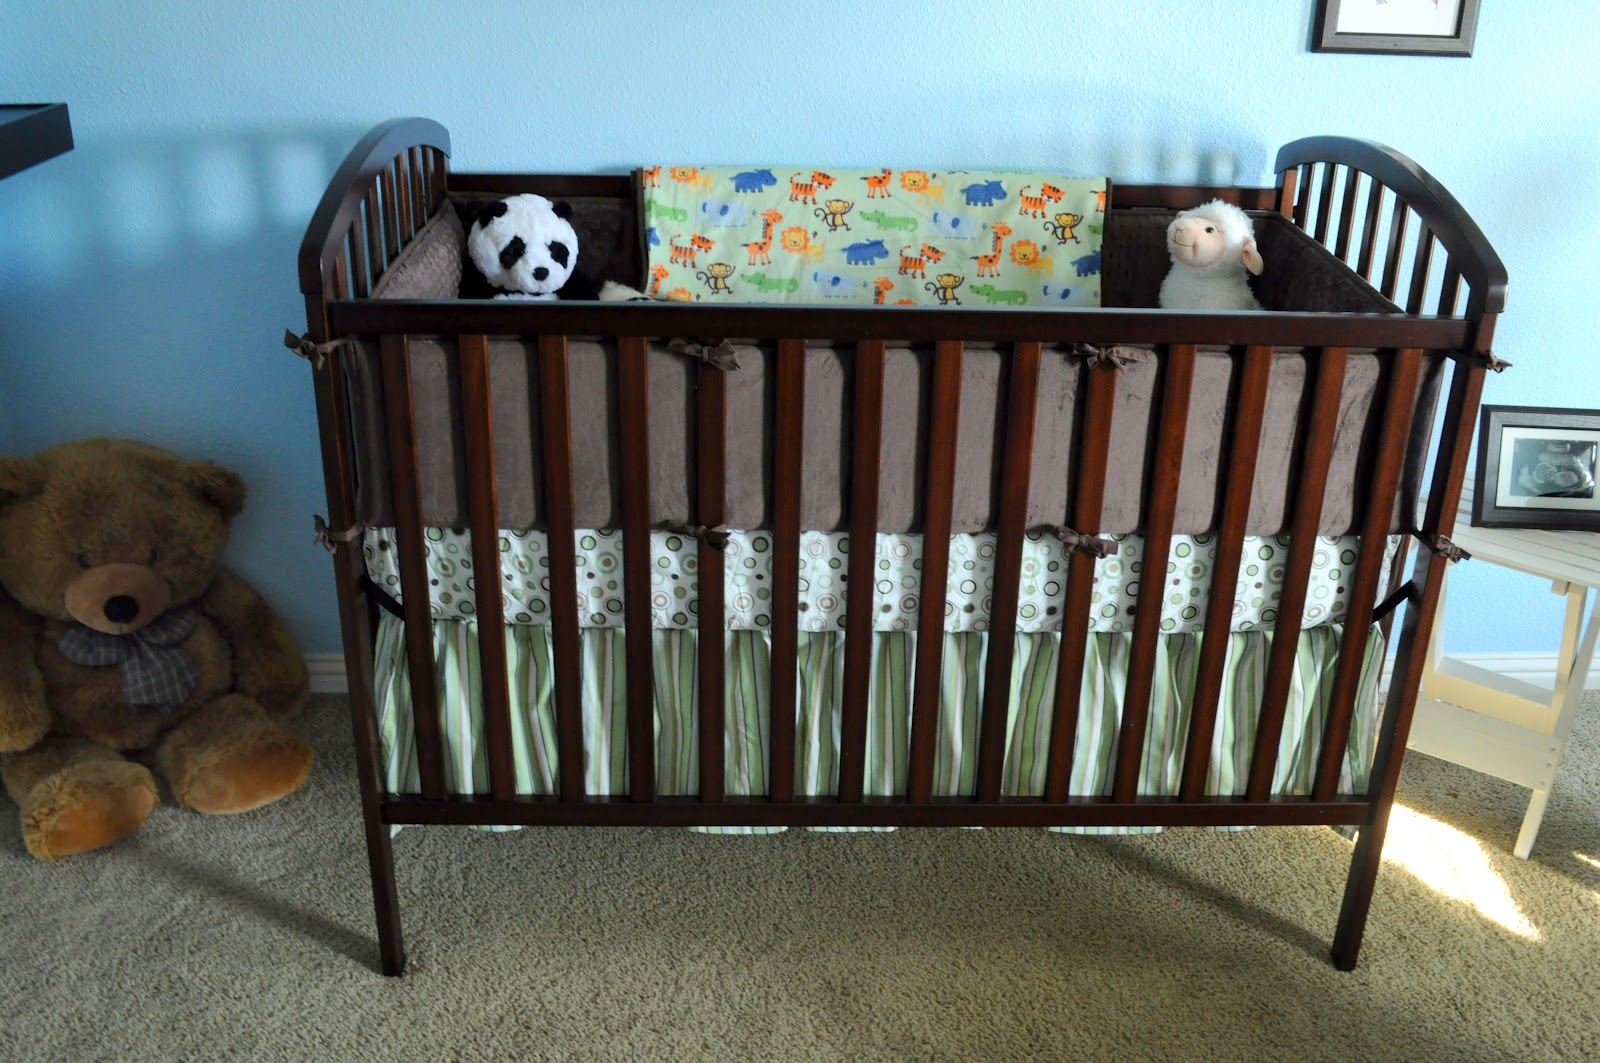
The super-cozy Crib (and the uber-soft bedding that was sponsored by baby's grandma Jodi :) 

All of the bedding is made by Carters and we ordered it online from JCPenny. Instead of ordering a 'set', I opted to mix-and-match different patterns/textures to help it fit the room. This set is also very gender-neutral if we have a little girl someday, just add a pink patterned sheet, and voila! :) 
I was originally going to skip the bumper pad, but after feeling this one made of the softest cotton ever ('minky' I hear it's called), I couldn't resist. It also really helps make the crib seem more cozy and 'finished'

...and last but not least....

Obviously, this photo was taken before the bedding had been delivered - just stare at the light :)
The Light Fixture. I fell in love with this fixture from Ikea when I first saw it and was just waiting for the opportunity to buy it for a room! I love it not only because it just looks really neat during the day, but because of the AMAZING shadows it casts at night! We're using this in place of a mobile over baby's bed - how fun would it be to look up at those shadows all night?!  (Of course, he'll be sleeping all night...right?!) We installed a dimmer switch (when I say 'we', I mean my handy electrician, Justin :)  so that it can always be on a little bit - so it's a mobile AND a night-light! It's perfect!
Because we weren't going to Ikea anytime soon, I had my sister pick this up on her way back to Wisconsin a couple of weeks ago and send it in the mail. How exciting to find this (and all 90 pieces inside) on my doorstep!
The flowery parts are just made out of paper, but the fixture requires only a small 40 watt bulb - so no fire hazard! (and although there were 90+ pieces, it was really easy to assemble  - it just snapped together!)

The Finished Product:
View from the door

View from the closet (Just as we suspected, Jasper has completely taken over the window seat - he rarely leaves that spot during the day when the sun is out!)
View from behind the glider